
Building a product finder with MetaLocator often involves the use of our "Where to Buy" buttons. When clicked, these buttons display a MetaLocator interface in a modal dialog window, which commonly displays product pricing and availability information for online and offline channels. This setup guide serves as a quick introduction to creating a button, adding it to your website, and understanding the basic operation of the button and related modal window.
These javascript-based buttons make use of a highly efficient integration method allowing you to quickly display buttons directly in your product pages, product catalogs and other integration points.
Button integrations result in HTML directly inserted into your Web page. As a result, your Web site's CSS can directly influence the position, style and formatting of the button.
Installing a Where to Buy Button
Start by creating a new Interface by clicking Interfaces, then New, and choose Where to Buy Button

Click Edit on the resulting Interface and choose which other Interface this button should trigger.

Click Save & Close, then Install to obtain the installation code.

MetaLocator provides this ready-made javascript for integrating your Where to Buy buttons. This code consists of two important sections. The first is the script tag that represents a single Where to Buy button. This fragment of code can be placed on a given Web page multiple times. This tag takes the following form:
<script data-metalocator-itemid="123456" data-metalocator-sku="yourskuhere" data-metalocator-title="Where to Buy" data-metalocator-attr-class="yourcustomcssclass" data-metalocator-param-lang="en-GB"></script>
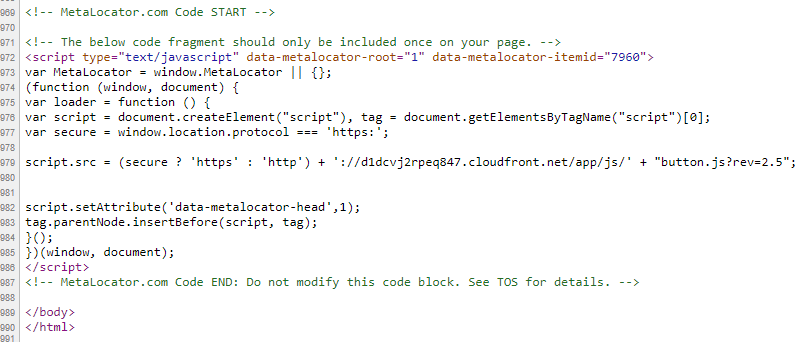
The second fragment is responsible for initializing the button fragments. There are no user-editable aspects of the initialization fragment. It looks like the below: Note: Always use the code provided in the MetaLocator Interfaces page as described above.
<script type="text/javascript" data-metalocator-root="1">
var MetaLocator = window.MetaLocator || {};
(function (window, document) {
var loader = function () {
alert("This is sample code, please obtain the real installation code from your account control panel or Account Manager.");
var script = document.createElement("script"), tag = document.getElementsByTagName("script")[0];
var secure = window.location.protocol === 'https:';
script.setAttribute('data-metalocator-head',1);
script.src = (secure ? 'https' : 'http') + '://' + 'code.metalocator.com/app/js/' + "button.js";
tag.parentNode.insertBefore(script, tag);
};
window.addEventListener ? window.addEventListener("load", loader, false) : window.attachEvent("onload", loader);
})(window, document);
</script>
Placing the code before the closing body tag of your page ensures the code is executed as quickly as possible. The above code looks for any button fragments on the page, and activates them as clickable buttons as shown below:
Button Options
Most of the options and features of concern are in the window that results from clicking on the button itself. However, the buttons can accept a few options that help to control the behavior and display. All options begin with data-metalocator, so we'll omit that for brevity's sake in the list below
itemid: (integer,optional) This option manually controls which Interface is triggered by the button. The button interface configuration controls the default value.
sku: (string,optional) This option controls whether the resulting interface receives a SKU parameter. The SKU parameter is your unique product code that identifies your product in MetaLocator. It should correspond exactly to a SKU value in the Products table of your MetaLocator account. If omitted, the resulting interface will not display product-specific information.
groupid: (string,optional) The product groupid. This allows the UI to present multiple purchase options for a group of products. This is commonly used to display a UI at the model-level, as opposed to specific product variants (such as a change in color or size).
param-lang: (string,optional) The resulting locale of the interface. The lang parameter is used to initialize the UI referencing a language file configured in MetaLocator. The language file may contain a numeric identifier which should also be included in this parameter, such as en-GB (1). The "1" indicates this is the first derivative of the default en-GB language file. This allows you to manage multiple language sets for different applications for a given locale. In the context of a Where to Buy UI, the base locale (en-GB) is used to localize the number format.
title: (string, optional) This option controls the title of the resulting modal window. Defaults to Where to Buy if omitted.
innertext: (string, optional) This option controls the text of the button itself. This is the clickable text of the button. Defaults to Where to Buy if omitted.
top: (integer,optional) Designates the top of the resulting modal window position in pixels.
attr-class: (string, optional) This option adds a CSS class to the class attribute of the resulting button. MetaLocator includes some classes automatically which you can leverage for styling as well. Styling MetaLocator buttons is just like styling any other button on your Website. You're in complete control of the layout and behavior.
param-* (mixed, optional) This option is special, in that it allows you to pass an arbitrary name/value pair to the resulting interface. In the example above, we are using this parameter to force the lang variable to en-GB. This behavior functions just as the deep linking options discussed in this article.
options-* (mixed, optional) This option is special, in that it allows you to pass an arbitrary name/value pair to the resulting interface which will affect Interface settings. In this example, we using this parameter to force the "Show Prices" setting to 0.data-metalocator-options-show_prices="0"
Creating a Where to Buy Button
To create a Where to Buy button, log into MetaLocator and select Interfaces, then New. Choose a Where to Buy Button from the list of preset templates.
The most important setting is directly at the top of the list of settings, and that designates which other Interface will be triggered by the button. This related interface is the actual user interface triggered by the button. So, if you have not yet created the Interface to be triggered by the button, save your current Interface, and create another new Interface. This time, choose a different type, such as Where to Buy - Tabbed Online & In-Store. Then, return to your button Interface and link the two interfaces using the first setting.
Installing for Failover
eCommerce brings higher stakes for up-time, redundancy and customer experience. The example above leverages a script tag to display the "Buy Now" button. However, in the case of an application failure, CDN downtime or other issue preventing the button.js script from attaching the MetaLocator UI, a fallback link can be configured. The fallback experience is typically an alternative method for purchasing products or discovering Where to Buy, such as the existing "Add to Cart" functionality, product detail page or custom fallback link.
The button.js initialization replaces the "href" attribute of the "Where to buy" tag. If the button.js fails to run, the customer experience will be controlled by the existing, unaffected markup. For example:
<a class="existing_class" data-metalocator-itemid="123456" data-metalocator-sku="yourskuhere" data-metalocator-title="Where to Buy" data-metalocator-param-lang="en-GB" href="add-to-cart.html">Add to Cart</a>
If the button.js fails to load, the user will still be able to purchase products via the add-to-cart.html link.